RV Water Heater Basics for New Owners
Nothing ruins a camping morning faster than an icy shower. If you are new to RV travel, the water heater can seem like a small metal box with a big attitude.
The good news is that most problems stem from a handful of simple mistakes. Once you know the core RV water heater basics, hot water becomes much easier to manage.
Start with the one detail that shapes every step after that: the type of heater in your rig. Understanding the difference between a traditional tank system and on-demand hot water is essential, as these options significantly impact both your overall energy efficiency and your comfort at the campsite.
Key Takeaways
- Identify your specific heater type (tank-style or tankless) and fuel source, as each requires different operating procedures and switch settings.
- Always ensure your water heater tank is completely full by running a faucet until the flow is steady before turning on any heating elements to prevent damage.
- Check critical components like the anode rod, bypass valves, and exterior burner tubes regularly to avoid common issues like corrosion, lack of hot water, or ignition failures.
- Perform routine maintenance by flushing the tank to remove sediment and conducting a pre-trip test to ensure the system is functioning correctly before you reach your campsite.
Start by learning what type of heater you have
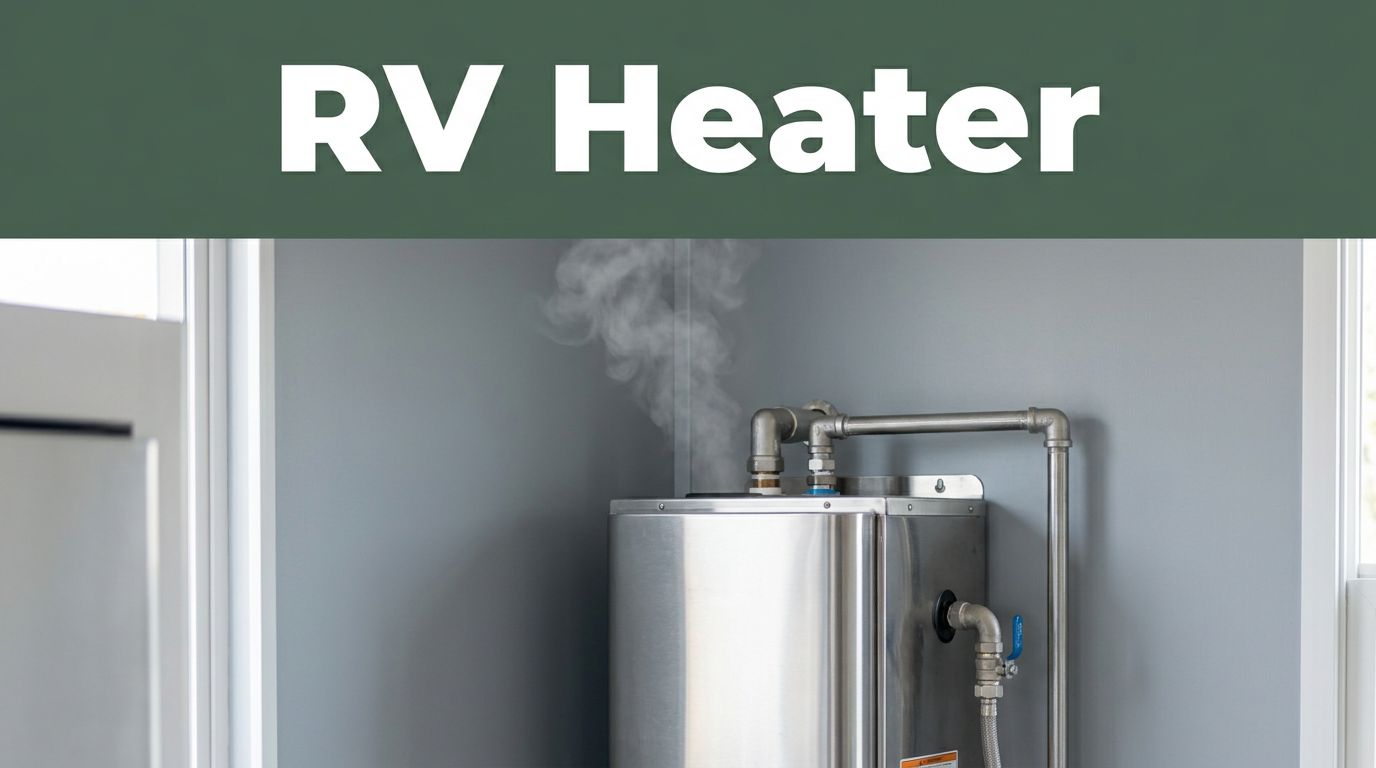
Before you troubleshoot anything, find the water heater’s model label and fuel type. Most RVs have either a traditional storage tank unit or a tankless model, and they do not behave the same way.
Storage tank units, primarily manufactured by brands like Suburban and Atwood, are still common in travel trailers, fifth wheels, and motorhomes. They usually hold 6 to 10 gallons of water, heat that supply, and then recover after you use it. Alternatively, a tankless water heater heats water as it flows, meaning you enjoy on-demand hot water without running out in the traditional sense. However, a tankless water heater requires steady water flow and a healthy propane supply to function correctly.
You also need to know whether your heater runs on propane, electricity, or both. Many new owners miss that second part. A dual-fuel model offers flexibility, but it may have one switch inside and another outside behind the service door.
This quick chart helps sort out the basics:
| Setup | What it means in daily use |
|---|---|
| Tank-style heater | You get a set amount of hot water, then wait for the recovery time |
| Tankless heater | You can keep showering longer with better energy efficiency |
| Propane mode | Heats quickly, but needs LP gas and good ignition |
| Electric mode | Works well on shore power, but never on an empty tank |
| Gas and electric combo | Gives you options, but adds one more switch to check |
If you bought a used RV, do not assume the previous owner left everything in the right position. Dealers, storage prep crews, and past owners often change valve settings. That is why a few minutes with the manual can save an hour of head scratching later.
For seniors and first-time campers alike, a label maker or a small note card near the control panel helps. Write down where the heater switch is, what fuel it uses, and where the bypass valves sit in normal mode.
Safe startup habits prevent most cold-shower surprises
Most water heater damage happens during startup. A tank-style heater must be full of water before you turn on propane or electric heat.
Hook up city water, or fill your fresh tank and switch on the pump. Then open a hot-water faucet inside. At first, the faucet may sputter and spit air. Keep it open until the stream runs steady, because that tells you the water heater tank has filled.
Never turn on the electric heating element in a tank-style RV water heater until you know the tank is full.
Next, open the exterior access panel and take a quick look. Check for soot, insect nests, loose wires, or a strong propane smell. Mud daubers love burner tubes, especially after storage.
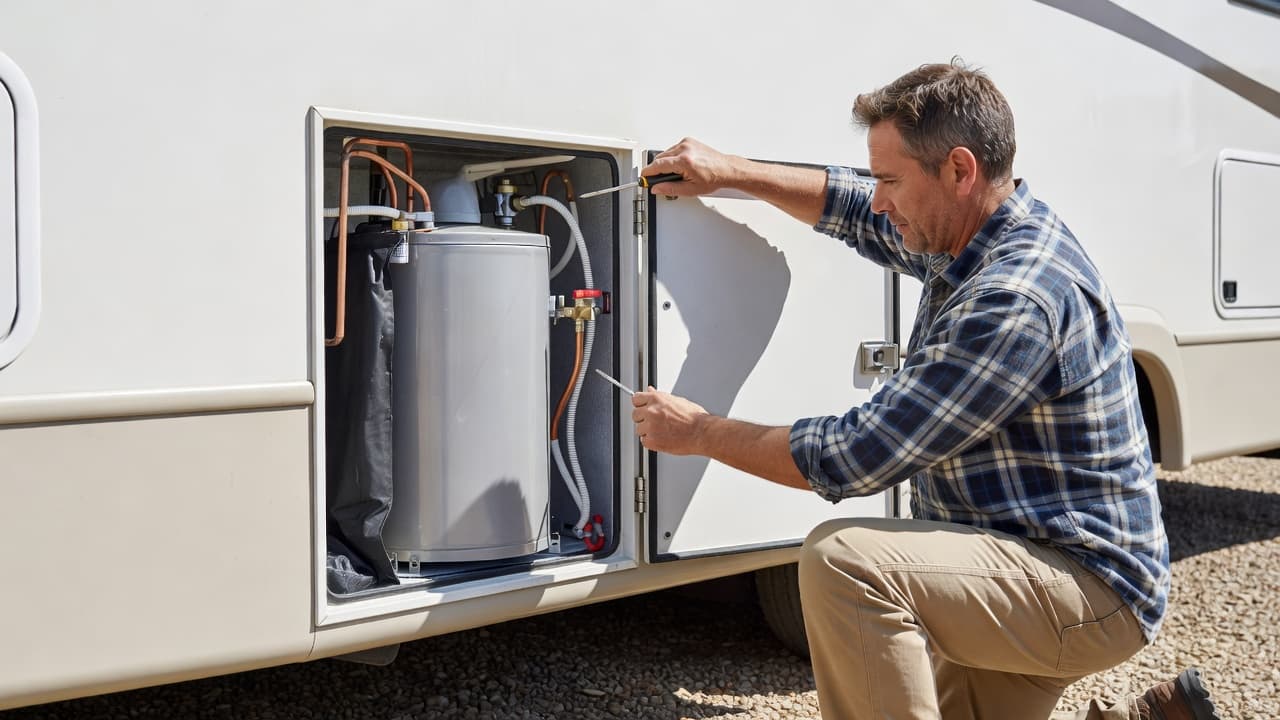
If the area looks clean, switch on the heater. Most modern units use direct spark ignition, although older rigs may still rely on a manual pilot light. If you are using LP gas, it is the primary choice when boondocking off the grid. If you are connected to shore power, switching to electric mode is often more convenient. If there is air in the gas line, lighting the stove for a moment can help move propane through the system to assist the ignition process.
If your RV has electric mode, check for a second switch behind the exterior access panel. Many owners never notice it. They flip the inside switch, get no hot water, and assume the heater failed.
Shutting the system down matters too. Turn off gas or electric mode first, then let the unit cool. Never pull the drain plug, anode rod, or pressure valve on a hot, pressurized tank. Scalding water under pressure is no joke.
The small parts new owners should check first
A few small components control most of the operation. Learn these basics, and you will solve many common RV hot-water problems faster.
The anode rod
Not every RV water heater has one. Suburban water heater models typically use an anode rod, while Atwood tanks usually do not.
The rod sacrifices itself to protect the tank from corrosion. Over time, it gets eaten away by the water. If it looks thin, rough, or badly depleted, replace it immediately.
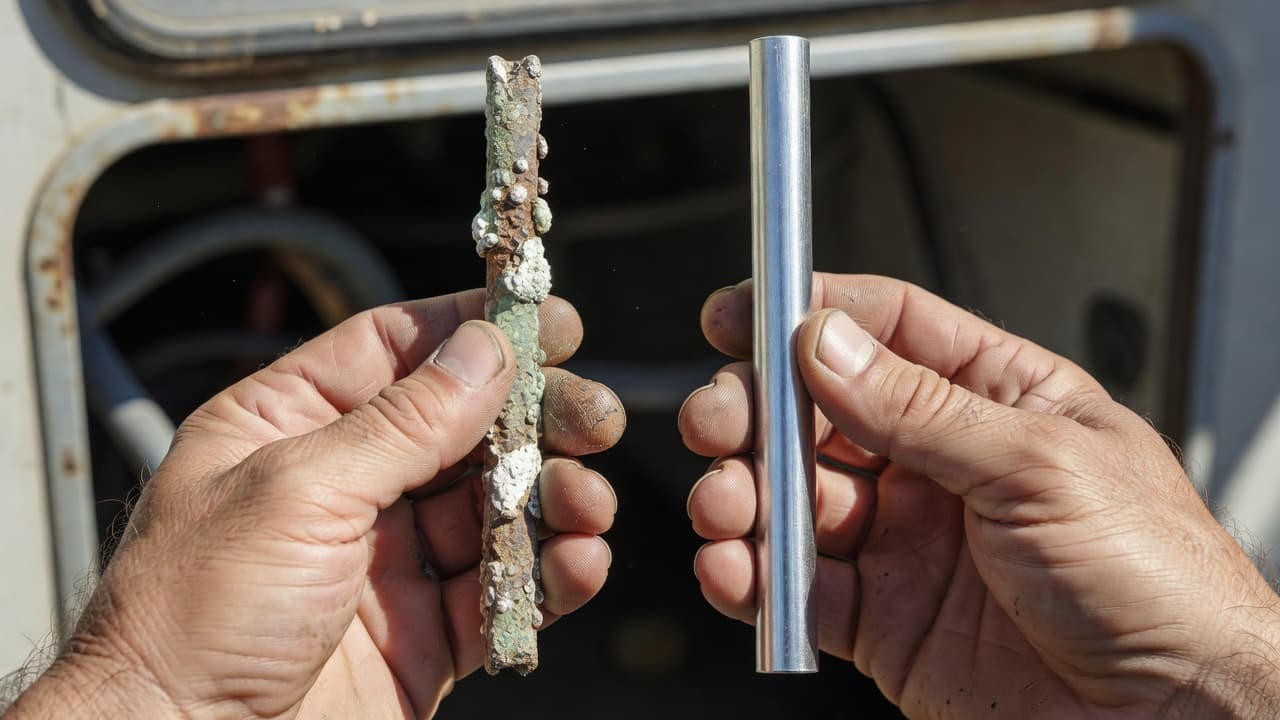
A worn rod will not always leave you without hot water today, but it can significantly shorten the life of your tank. If your hot water smells like rotten eggs, the anode rod is the first thing you should check.
The pressure relief valve
The pressure relief valve protects your tank from excessive internal pressure. You will usually find it near the top of the heater behind the outside access panel.
A small drip during the heating process can be normal. However, a steady leak means something needs attention, such as debris in the valve, excess pressure, or a worn component. Do not cap the valve off, and never snap it open while the water inside is hot.
The bypass valve
The bypass valve directs water around the heater during the winterizing process. It is usually located on the back side of the tank, often hidden under a bed, behind a cabinet, or tucked into the plumbing bay.
If the heater is accidentally left in bypass mode, your faucets may work fine, but the water will never get hot. This mistake occurs frequently after you finish winterizing your rig or after a visit to a repair shop.
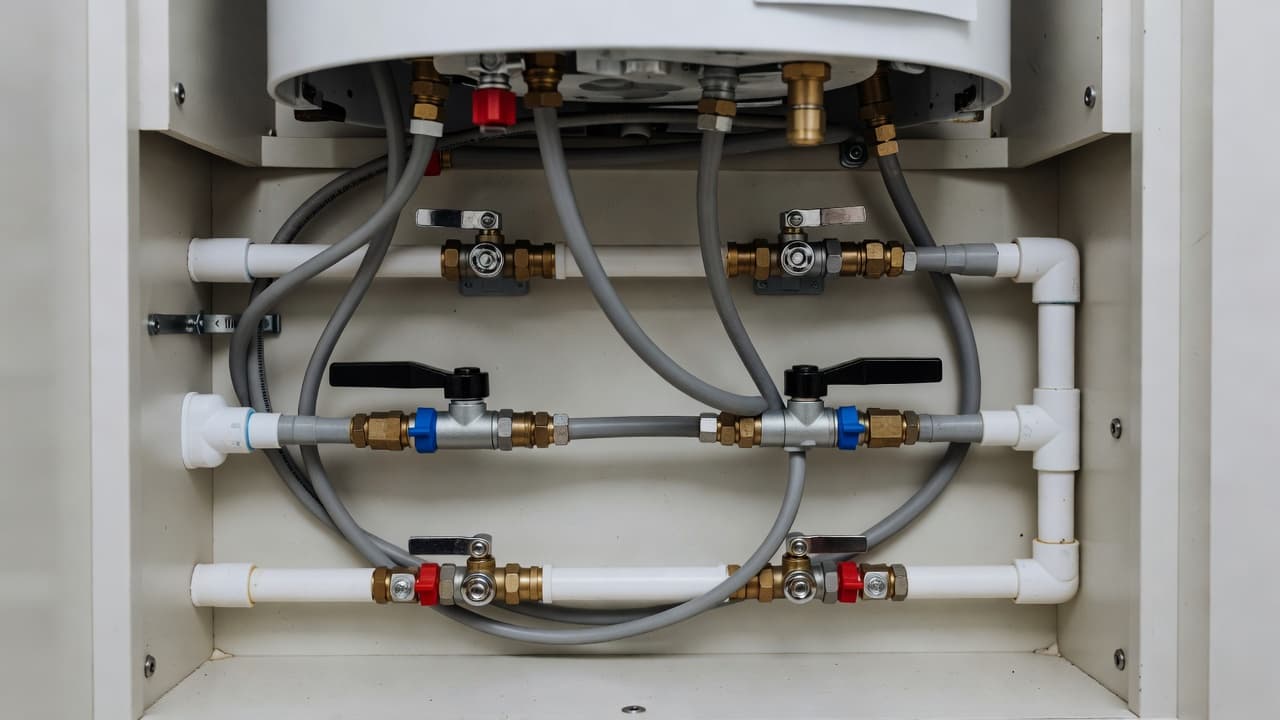
When you de-winterize, double-check those valves before you assume the unit is broken. For many new owners, the bypass setting is the missing piece to a working system. If the bypass is open and the water still will not heat, the internal thermostat or the high-limit ECO switch might be the culprit. These are internal safety components that prevent the heater from reaching dangerous temperatures.
Common RV water heater problems at the campsite
Most hot-water trouble at the campground comes from one missed detail rather than a major breakdown. Use these tips to troubleshoot issues quickly, starting with simple checks before you buy replacement parts or call for service.
- If you have no hot water at all, check the propane level, the 120-volt breaker, and both heater switches.
- If the water turns lukewarm fast, look for bypass valves in the wrong position, sediment inside the tank, or incorrect thermostat settings.
- If the burner clicks and quits, air in the propane line, a dirty propane burner, or low battery voltage may be the cause.
- If your tankless water heater swings from hot to cool, reduce the cold-water mix and keep the flow steady.
- If the shower never gets properly hot, check the outdoor shower handles. When those valves stay open, they can mix hot and cold water behind the scenes.
- If the unit refuses to fire up, check for a tripped ECO switch located on the heater assembly.
One of the best camping tips is to test your hot water soon after setup. Run a faucet for a minute while you still have daylight and patience. That small habit helps weekend campers, seniors, and families avoid a late-night surprise.
Tankless units bring their own learning curve. They are popular in newer rigs and some van life builds, but they can be picky about flow. If you barely crack the faucet open, the burner may cycle on and off, as reliable on-demand hot water requires consistent water pressure. Keep in mind that the heat exchanger can scale up over time, which may also impact performance.
If the heater still will not work, wait for it to cool and look for reset buttons behind the outside panel. Some models have them under rubber covers. A reset will not fix every problem, but it is worth checking before you assume the whole unit is bad.
Easy maintenance for weekend trips and long-term travel
Basic care keeps your heater ready for the next adventure. It also cuts down on sediment buildup, unpleasant odors, and surprise equipment failures.
If you have a traditional storage tank, you should periodically flush the tank to remove debris, especially if you frequent hard-water areas. Full time RVers often perform this task several times a year. Occasional campers may find it sufficient to do so at the end of the season and again before a long summer trip.
Many owners find a simple written routine helpful, as service steps are easy to forget after a busy travel day. Keep your checklist brief and tape it near the plumbing bay for quick reference.
For winterizing your rig, follow these steps:
- Turn off the heater and allow the water to cool completely.
- Shut off the water pressure and open a hot water faucet inside the RV.
- Remove the drain plug or the anode rod, then open the relief valve to vent the storage tank.
- Set the bypass valves so antifreeze skips the heater, if your specific winterizing method requires it.
Weekend campers, van life travelers, and full time RVers all benefit from the same habit: inspect the heater before storage and again before your next outing. Before hitting the road, ensure your heater functionality is tested while connected to shore power to confirm the electric heating element is ready for the season. A five-minute inspection now beats dealing with a split fitting or a dead heating element once you reach your campsite.
If you like practical reminders throughout the season, the RV Life Insider newsletter is worth a look. You can View All Our Newsletters for timely maintenance notes, and View Our Website for more blogs, travel planning tools, marketplace finds, community updates, and camping tips.
Frequently Asked Questions
Why is my RV water heater not producing hot water even though it’s turned on?
First, check your bypass valves to ensure they are in the ‘normal’ position rather than the winterization setting. Also, verify that your propane supply is on or that your shore power breaker is not tripped, and check for any external switches located behind the service access panel.
How often should I replace the anode rod in my RV water heater?
Inspect your anode rod at least once a season or every few months if you travel frequently. If more than 50% of the sacrificial metal has eroded or the rod appears thin and jagged, you should replace it immediately to prevent internal tank corrosion.
Is it safe to run my RV water heater on both gas and electric at the same time?
Yes, many RV water heaters are designed to run on both sources simultaneously for faster recovery times. However, ensure you have sufficient propane levels and a reliable power source before engaging both, and always verify that the tank is full of water before activation.
Why does my hot water smell like rotten eggs?
This odor is usually caused by sulfur-reducing bacteria reacting with the magnesium in your anode rod. You can often resolve this by flushing the water heater tank thoroughly or by replacing a heavily corroded anode rod with a fresh one.
Final thoughts
Cold showers in an RV usually come from a small mistake rather than a mystery failure. Most often, the tank was not full, the bypass valve remained open, or a simple safety check was skipped.
Once you understand your specific heater type, proper startup steps, and essential components, consistent hot water becomes a routine part of your travels. That is the true value of mastering RV water heater basics early on in your ownership experience. With a little practice, you can ensure every camping stop remains comfortable while keeping your rig ready for the next adventure on the road. By staying proactive with these RV water heater basics, you will spend less time troubleshooting and more time enjoying your trip.
This post may contain affiliate links. If you make a purchase through these links, I may earn a small commission at no extra cost to you.